

Most attic mold in cold climates doesn’t come from roof leaks. It comes from inside the house. Showers, cooking, laundry, breathing, and houseplants put water vapor into indoor air every day. Warm air rises and pushes on the ceiling. Wherever it finds a gap, it moves into the attic and carries that moisture with it. In a central Iowa winter the attic is often near the outdoor temperature, so the vapor will condense or freeze on the first surface cold enough to catch it.
The process is slow, which is why it surprises homeowners. Frost builds up on the underside of the roof deck and on nail tips through December and January, often without anyone noticing. Then a February thaw or a sunny March afternoon melts it all at once. Wood that has been wet for weeks, followed by a sudden release of meltwater, is exactly what mold needs. The stains people find in spring usually started forming months earlier.
To see where things go wrong, it helps to follow that warm air up through the attic one layer at a time. Each layer either stops the moisture, lets it through, or holds onto it. When mold appears on the roof sheathing, the cause is almost always in a layer below.
Families around Des Moines who want that full picture without guessing often call Baker Restoration & Remodel, a family-run company that has worked in central Iowa homes for more than 35 years. Owner Matt Baker is a certified mold inspector and a certified mold remediation contractor. His crew uses borescopes, moisture meters, and particle counters to trace attic growth back to its source. Their certified work covers attics, crawlspaces, and living spaces, and they also handle waterproofing and general remodeling when repairs extend beyond the mold. If your attic hatch reveals dark sheathing or matted insulation this season, start with a detailed inspection and air sample testing before anyone begins scrubbing.
The ceiling plane and what punches through it
The drywall ceiling is the first barrier between the living space and the attic. On its own it does a decent job. The trouble is the holes cut into it. Recessed can lights, bath fan housings, attic hatches, plumbing vents, and ceiling boxes all leave openings. Older recessed cans that aren’t rated as airtight can act like small chimneys.
The attic hatch deserves its own mention. An unweatherstripped hatch over a hallway leaks a surprising amount of warm air. In many inspections the mold pattern on the sheathing above it is clearly visible from the hatch itself.
Top plates, chases, and the hidden bypasses
Above the drywall, interior wall cavities open into the attic through their top plates. Plumbing walls and chimney chases are the worst offenders, because builders cut larger holes there and seldom sealed them. In 1.5-story homes, kneewalls and finished half-story rooms create long, hidden pathways that are hard to reach.
Air sealing these bypasses with foam, caulk, or rigid blocking usually does more to prevent mold than any other single fix. It is also the step most often skipped when someone simply blows more insulation on top.
Insulation that hides the evidence
Fiberglass and cellulose slow heat loss, but they don’t stop air. Warm air moves through loose fill and carries moisture with it. Dark streaks in fiberglass are a useful clue. The fibers filter dust out of moving air, so a gray or black patch marks a spot where air has been leaking through.
Cellulose has a different issue. It absorbs water when meltwater drips onto it from above, then holds it against the ceiling drywall. Insulation that has been soaked or has grown mold generally gets removed and replaced instead of cleaned, since there’s no dependable way to clean it in place.
The ventilation channel between soffit and ridge
An attic is supposed to exchange air. Cold, dry air comes in at the soffits and leaves near the ridge, taking stray moisture with it. Common building guidance calls for a set ratio of vent area to attic floor area, split between intake and exhaust.
Two recurring problems break that flow. The first is insulation blown into the soffits with no baffles to keep the air channel open. The second is mixing exhaust types, such as box vents and a ridge vent on the same roof. When that happens, one exhaust can pull air in through the other while the soffits sit idle. Either way, moist air lingers under the deck.
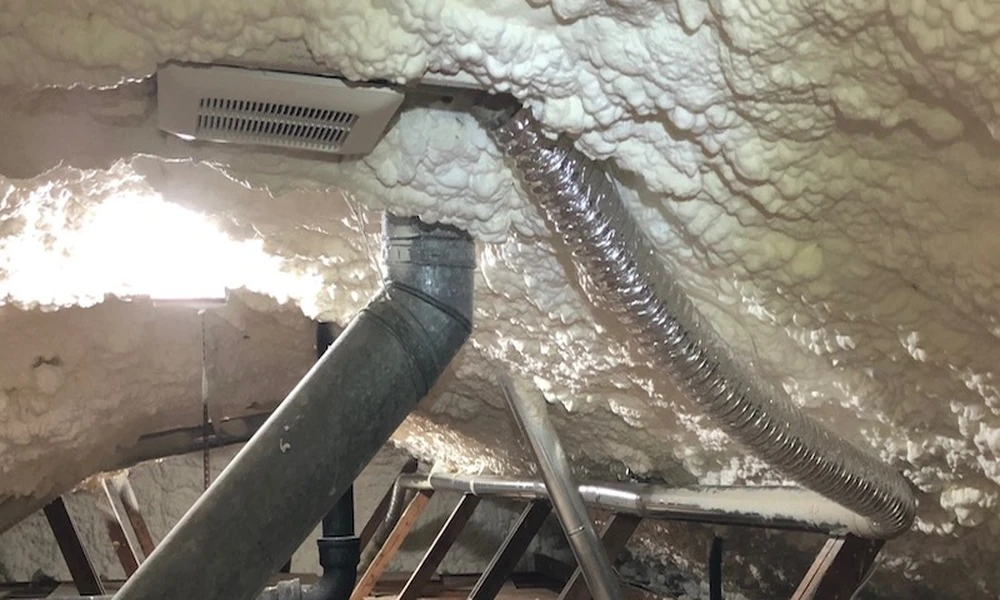
Bath and kitchen fans also live in this layer. Codes require them to exhaust outside the building. Even so, inspectors still find fans that end in the insulation, ducts that slipped off a roof cap, and uninsulated ducts that collect condensation and drip back down. Mold concentrated around a single fan termination is a very common pattern.
Roof sheathing, where the stain finally shows
The plywood or OSB deck is the coldest surface in the attic. That makes it where moisture lands and where mold shows up. North-facing slopes tend to be affected first and most heavily, because they get little winter sun to dry them. Growth often thickens toward the ridge, where the warmest and wettest air collects.
Staining alone doesn’t prove the growth is active. Dark marks can be old and dormant. A moisture meter reading, combined with the season and the pattern, tells you more. Wood that stays roughly above 20 percent moisture content can support growth. Delaminating plywood or soft, crumbling OSB edges mean the problem has gone beyond cosmetic damage.
Nails, the ridge, and the drip season
Roofing nails that poke through the deck conduct cold straight into the attic. Each one becomes a small frost collector. On a cold snap that turns quickly into a warm day, those frosted nail tips melt together and drip onto the insulation. Homeowners sometimes mistake this “attic rain” for a roof leak and replace shingles that were fine.
Rust rings around nail tips and water spots on the insulation directly under them point to frost, not to a leak in the roofing.
Reading the layers in order
A lasting repair works from the bottom up, even though the mold is at the top. The air leaks in the ceiling and top plates are sealed first. Ventilation is then balanced and fan ducts are rerouted outside. Only after that is the sheathing cleaned, using HEPA vacuuming along with sanding, scrubbing, or blasting, depending on the material and how heavy the growth is. An encapsulating sealant may go on afterward. Damaged insulation is replaced at the end.
Post-remediation air sampling confirms that spore counts are back to normal levels. Skipping any of the lower layers usually means the same staining returns on the same north slope by the following spring.








Leave a Comment